WHERE TO START AND DETAILER' NIGHTMARE STEPPED FOOTINGS
Most of the detailers doesn’t know what
type of Building they are detailing.
We need to know what type of building we
are detailing, which will help our common sense to see if something extraordinary.
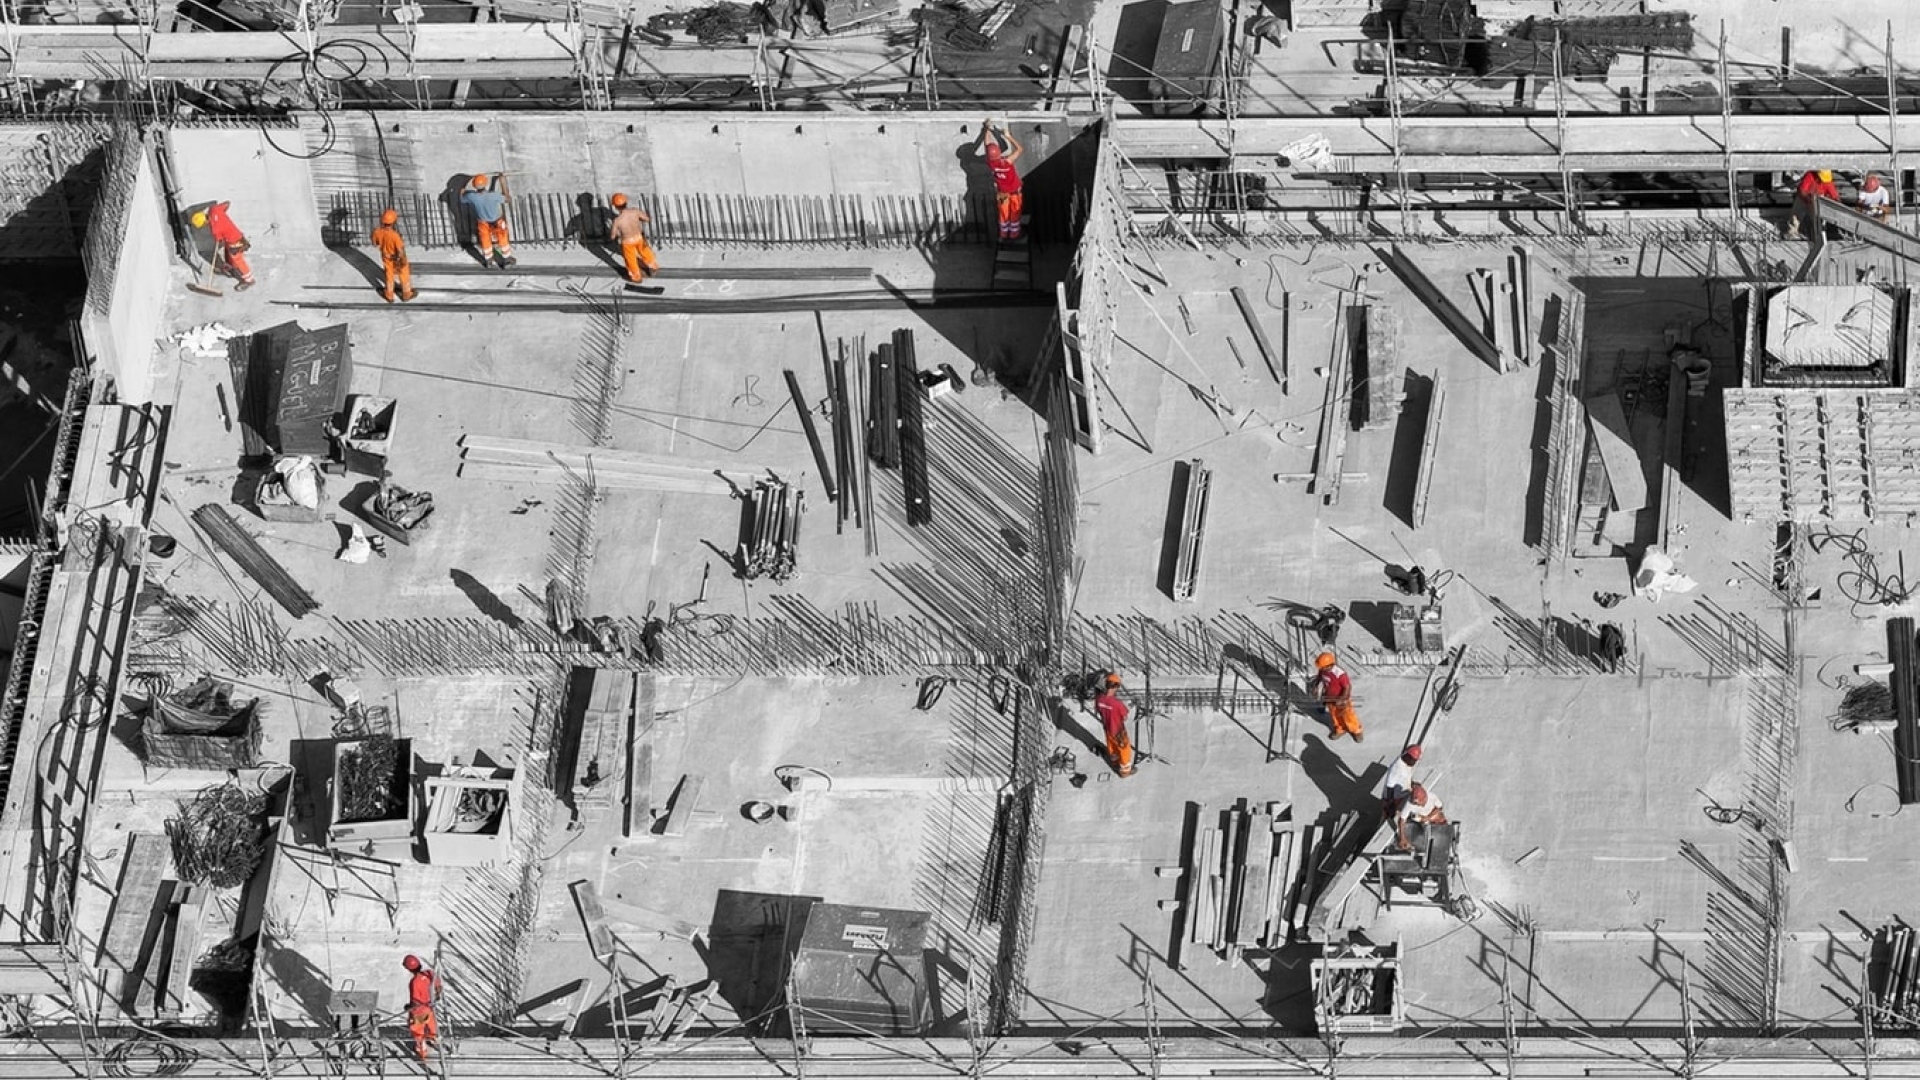
Try to visualize the construction sequence,
pay attention to construction around your city and try to understand what they
are doing.
We
start detailing the way construction workers start building. The first element to be built has to be the first element to be detailed. That
helps with the construction schedule as well.
Let's say,
a contractor needs to start his 5 story project within a week and he
gave you the shop drawings to do. If you start from the 5th floor and hoping
to finish the project in a week, you are risking the whole project. If you delay everybody will be delayed on the schedule. A concrete contractor will be delayed,
and because of the concrete contractor’s delay, the plumber will start his work on a
later date, because of a plumber, an electrician will start later, and so on.
So we have to start with footings. The First element closer to the ground is first to detail.
1 - First find out all the bottom of
footing elevations. In most cases all the footings are level. Find out
where footings change elevations and find the location for stepped footings. See the example below

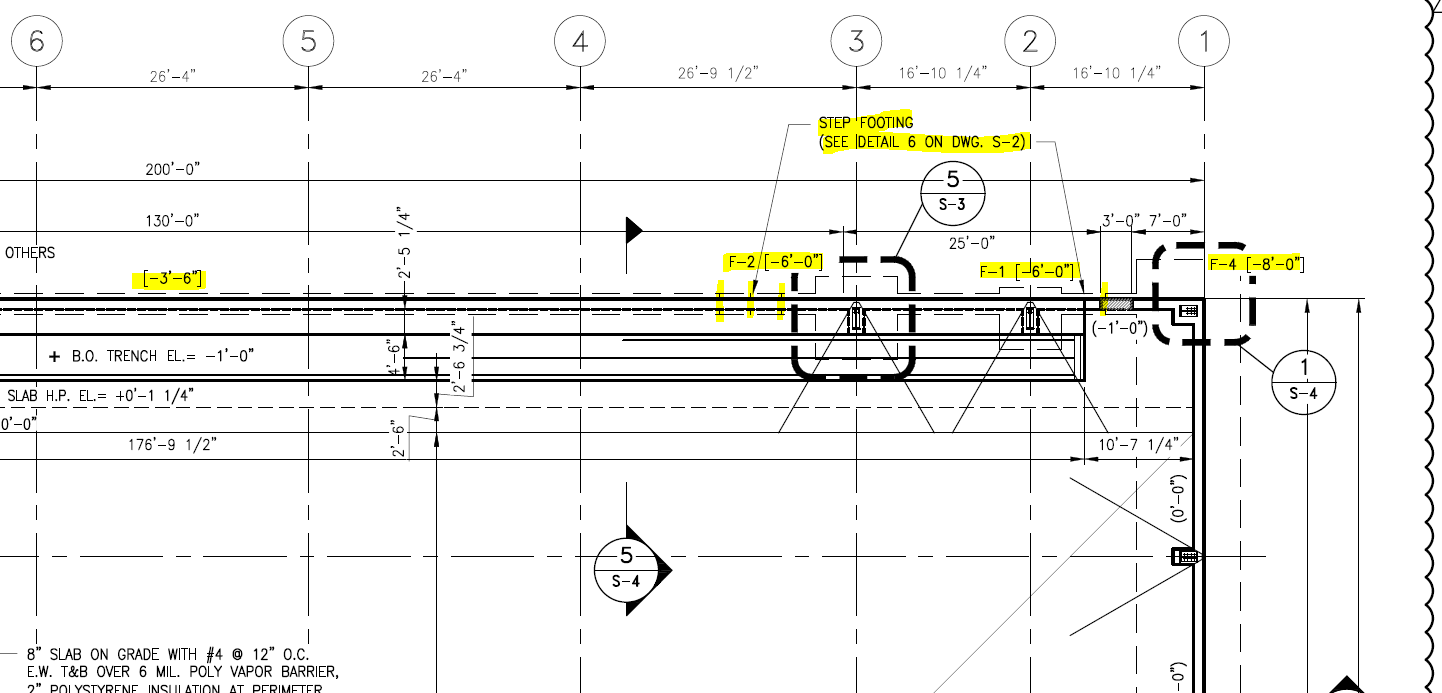
And we need to find the stepped footing detail
Now let's do the one on the left side of the column
3, the bottom of footing is changing from
-6’-0” to -3’-6”. The difference is 2’-6”, and Max. height on typical step detail
is 2’-0” see above.
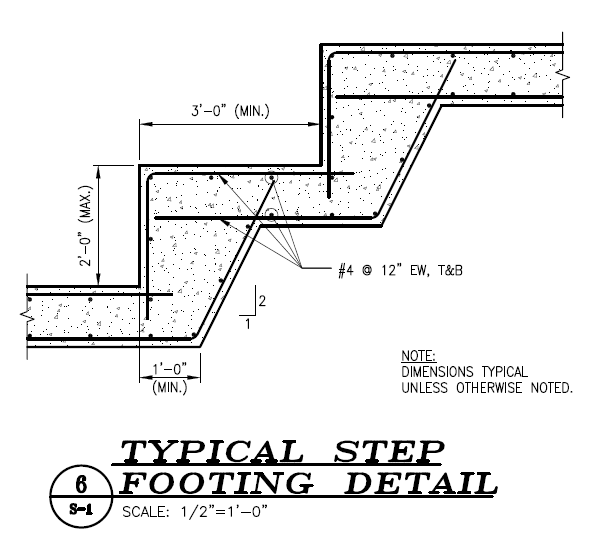
So we need at least two steps,
Basically, we can do any combination we want, but some are practical and some not.
For example, we can do 5 steps at 6”, which
would be a lot of work for concrete contractors. Our aim should be “Min. count of steps
as much as possible”.
So we can do 2’-0”+6” or 6”+2’-0”, the common way is to do the higher step first,
And show all the elevations for the step.

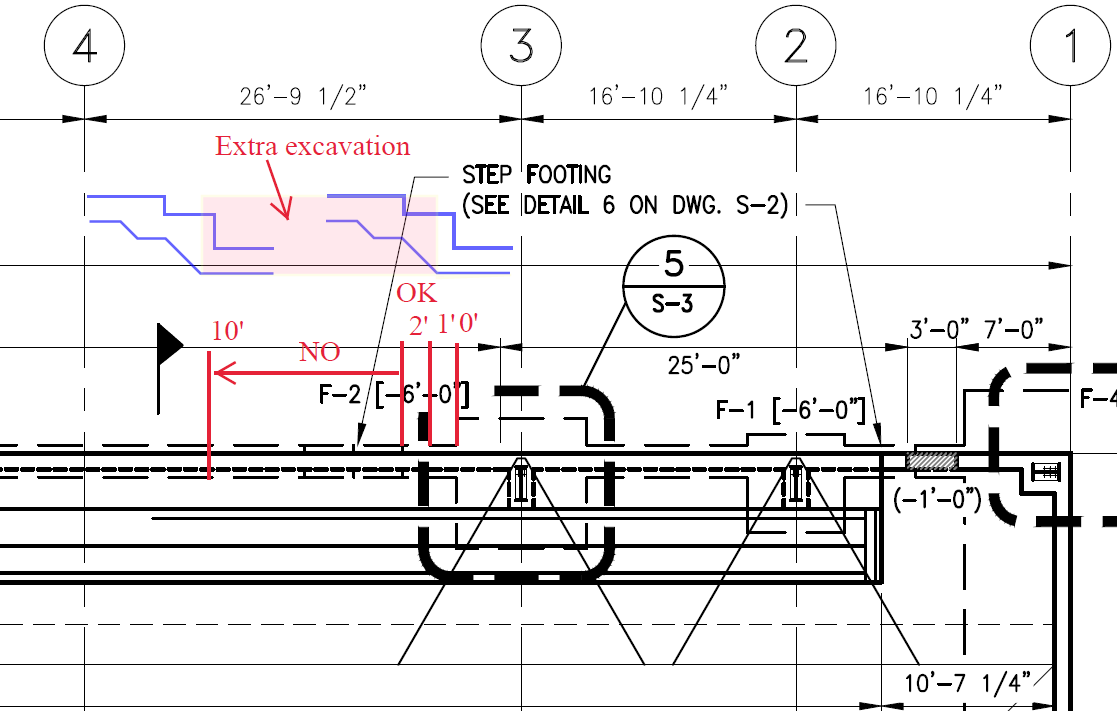
But there is one more question.
Where should be the location of these steps?

A drawing showing 3 steps, we only needed 2
and where should we place these steps?
Whatever count engineer shows on the plan
view is not critical, as long as you follow the typical step detail, you can create
your own steps. But don’t forget “ Min as possible”.
You can place your steps in any place you want, but as much as closer to the deeper side to minimize excavation and concrete.
See the below
picture if you place the steps at column line 4, you will get more excavation
as shown in the pink area. More excavation meaning is more concrete, more equipment time, more
operator time, basically more money.
You
can have steps starting right at the edge of column footing or 1’ or 2’ away
from column footings. Don’t make it like 3” away or 4 ½” away, try to use 1’ increments. This way contractors' formwork would be a lot easier.
Written by Kamil Cabuk , MS
Thanks for those informations